Yoga Poses For Your Back (Part 3)
From feeling better to simply being healthier, there are many reasons to try different yoga poses. For most parents, it’s usually back pain. Explore some of these wonderful spinal twists and a restful pose to heal and rejuvenate. Then go back and read Part 1 and Part 2 of this series!

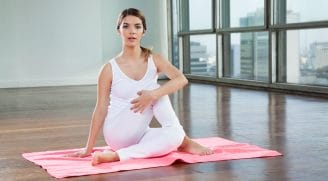
Ardha Matsyendrasana (Seated Spinal Twist)
Also known as Lord of the Fishes, or Seated Spinal Twist — Excellent for releasing tension on the upper and mid-back.
- Begin in dandasana
- Bend the right knee so it’s pointing toward the sky, and place the right foot on the outside of the left hip on the ground
- Bend your left knee underneath so that your knee is pointing towards the front of the room, and place the left foot on the outside of the right hip, with the left side of the foot on the ground
- Take the left hand or left elbow to the outside of the right thigh, and twist to the right.
- To take Humble Lord of the Fishes, take both hands to the outside of the left leg on the ground and allow the upper body to round as the head moves towards the ground
- Repeat second side
Supine Spinal Twist
Can feel particularly relieving to sacroiliac pain.
- Begin on the back with the legs out straight
- Extend the arms out like a T
- Bend the right knee, and move the hips about 6 inches to the right
- Using the left hand, draw the right leg across the body to the left side
- Allow the right shoulder to drift towards the ground
- Repeat second side
Constructive Rest
This pose involves a wall or a chair and is extremely helpful for improving chronic low back pain. This allows the alignment of the pelvis and the femur heads to reconfigure, and takes pressure off of your low back.
- Using the wall, take the hips about 6 inches away from the wall and lay down on the back on a mat
- Extend the legs up the wall, allowing the heels to rest against it
- Palms face up next to the sides
- To do this pose using a chair, begin with the hips on the ground below the front edge of the seat of the chair, lying on the back
- Bring the legs up with the knees bent, so that the calves are lying on the chair seat and the knees are stacked directly on top of the hips
- Release for several minutes or as long as you can
Jordan Kersten is an expert with NewboRN Solutions, which has over 75 highly vetted providers for families all in one stop. She focuses on alignment and healthy movement for the joints and specializes in abdominal diastasis (stretching of the abdominal wall during pregnancy). She was certified through YogaOne of San Diego as an Interdisciplinary Vinyasa Flow Yoga Instructor, and is registered with Yoga Alliance. Jordan teaches Vinyasa Flow, Hatha Yoga, Ageless/Gentle Rehabilitation, Hatha, Gentle, Prenatal and Postnatal Yoga.
This is a guest post and all content remains the opinion of the author alone. This post does not replace medical advice you would get from a medical professional.