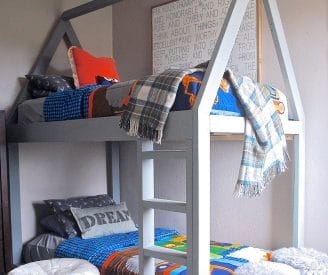
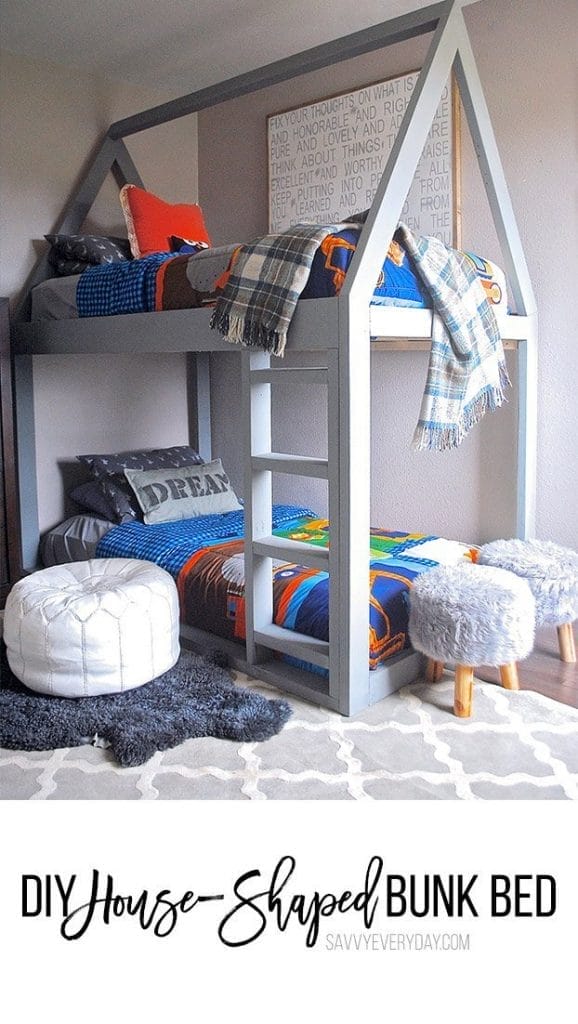
Simple DIY House-Shaped Kids Bunk Bed to Make This Weekend
After searching for the perfect new bunk bed for our boys’ bedroom, we decided to come up with our own tutorial for a house bunk bed. House Beds are a huge trend right now. I saw my first house bed over a year ago and I fell in love and I swore that as soon as we built our daughter a toddler bed someday, I would make a super cute pink house bed, decorated in cute pom-pom buntings and it would be perfect. Well, it’s been a year and she’s only 16 months old — Still a ways away from being in a toddler bed. But we’re in the process of decorating our boys’ bedroom and needed to build them a new bunk bed set as their old set was massive and took up half their room, so why not use this as an opportunity to make a house bed? The only problem was I couldn’t find a tutorial for one, let alone a picture . . . so I got to drawing. Keep reading for this one-of-a-kind weekend DIY House-Shaped kids bunk bed tutorial (minus the bed rail which was added on later).
HOUSE-SHAPED BUNK BED: WHAT YOU’LL NEED
- 8 2×4’s 8′ Length
- 3 2×6’s 8′ Length
- 2 2×2’s 8′ Length for Runners
- 3 1×4’s 8′ Length for Slats
- Paint Brush
- 100 pack of 2″ Screws
- Paint or stain of choice
- Wood Glue
- Sanding pads for orbital sander
- Wood filler
- Drill
- Driver
- Table Saw
- Orbital Sander (We used our dustless sander)
- Clamps (if doing this alone)
I should mention before I give you the cut list that the pictures below are not of the actual dimensions. We built the house part a lot smaller and once we got his massive 12″ mattress on realized it was tight. So we unscrewed the entire bed and made it much taller. Keep in Mind, We pre-sanded all our wood. We did a quick sand after the bed was put together just on the edges. Learn from our mistakes. Here are the dimensions you will need to make a house-shaped bunk bed.
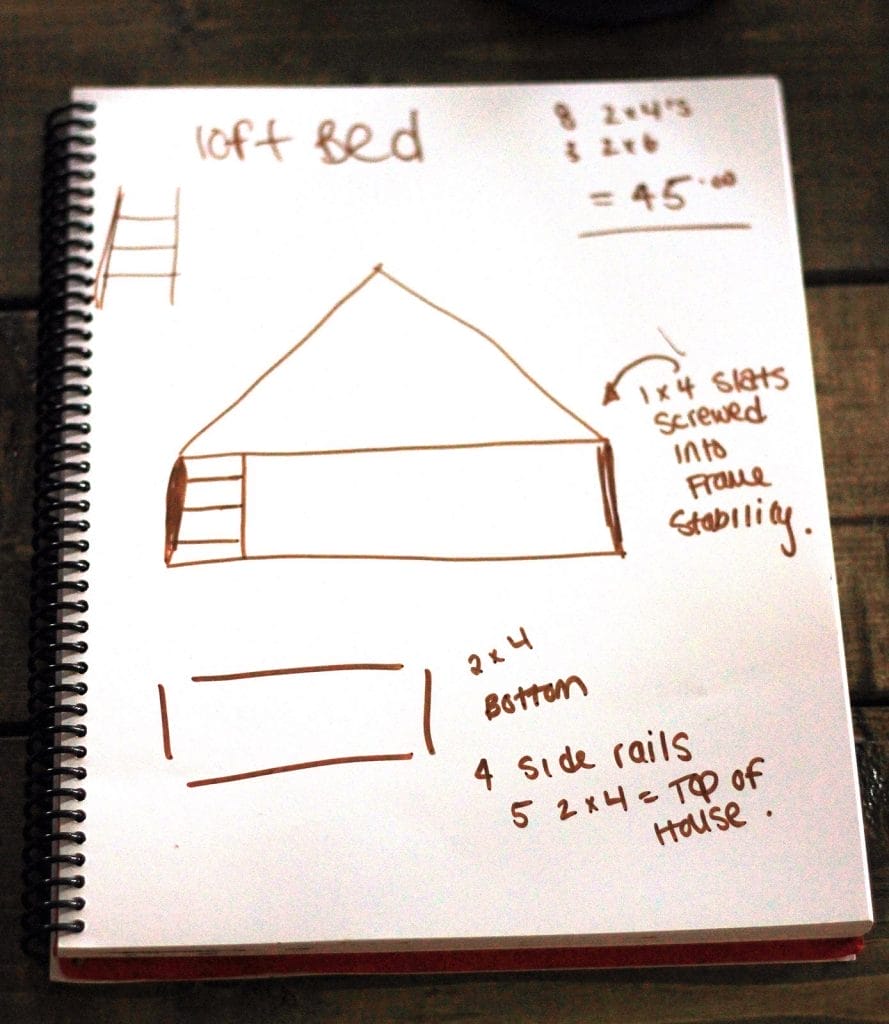
BUNK BED CUT LIST
Tall Posts: 4 2×4 : 46″ Length * Top Angle Cut at 15 Degrees
Side Rails: 2 2×6 & 2 2×4: 74.5″ Length
Cross pieces: 4 2×4: 38″ Length
( For Top Bunk Cut 2 2×2’s for rail at 74″ & Cut 8 slats at 42″ )
HOUSE CUT LIST
First Angle ( Longest ): 45.5″ Length | Bottom Angle 15 degrees & Top 30 Degrees
Shorter Angle: 42″ Length | Bottom Angle 15 degrees & Top 30 Degrees
Top Stringer: 74.5″
Now that you get your wood cut. Let’s start!
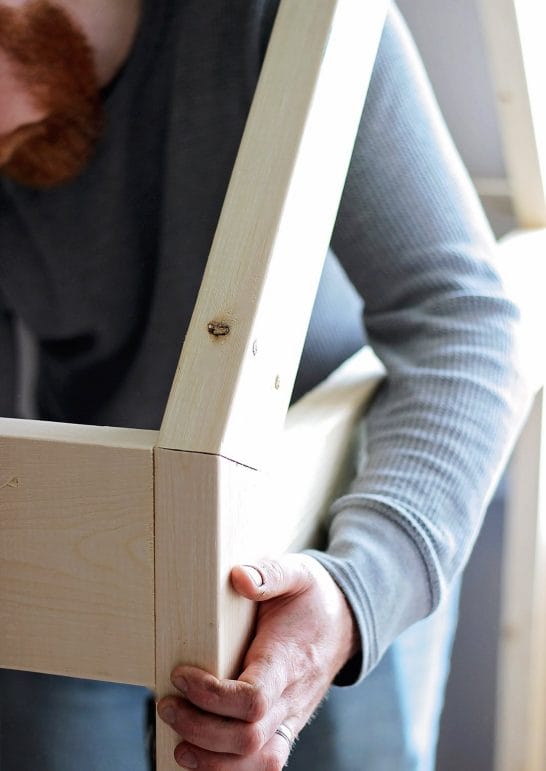
Make both end panels (we call them the “houses”). When Glen was cutting the angles for each side, he numbered everything. It’s a good idea to do. Or you could cut as you go.
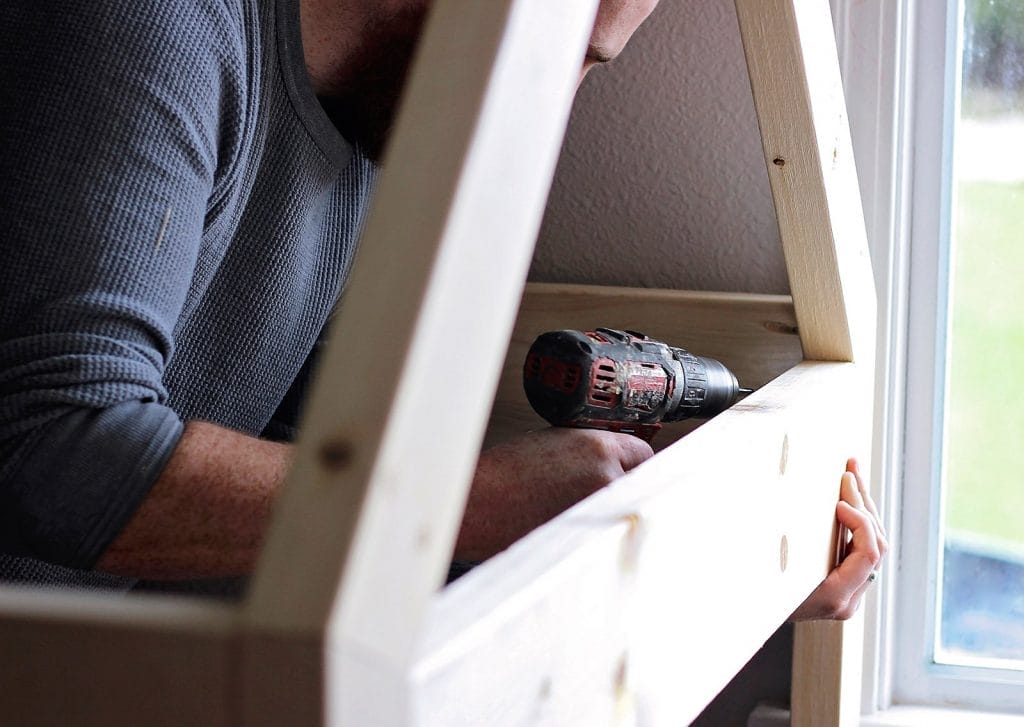
Lay your house on the ground and line it all up. Once in form, you will be making all your pocket holes — Two on each cut. We also put silicone between every cut. You want this bed to be extra strong— Especially if you have kids like us that live life hard.

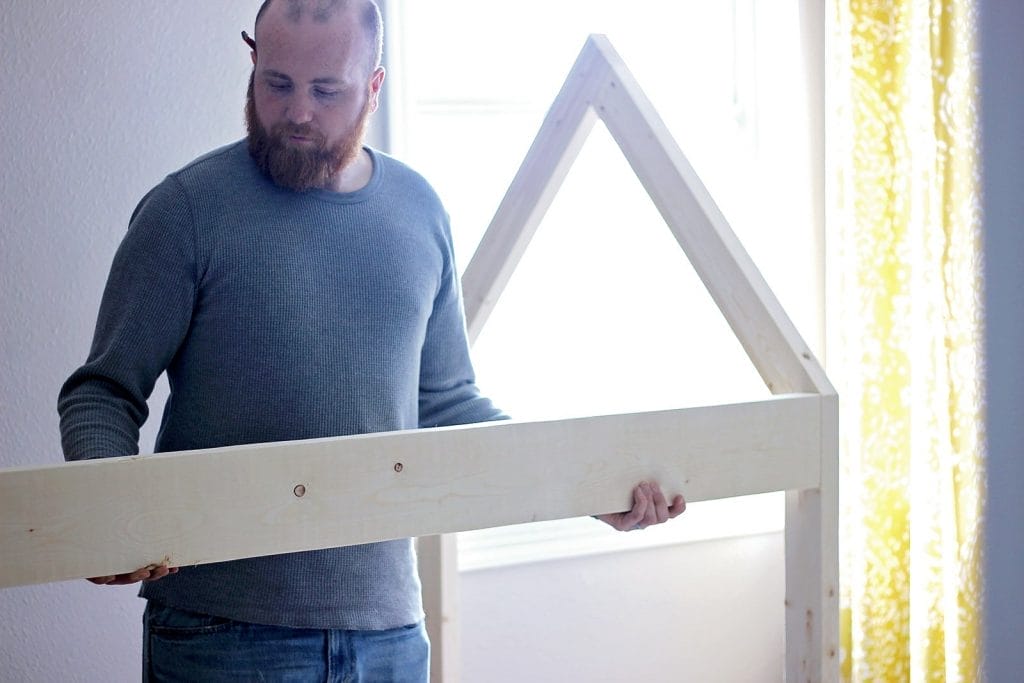
Once both of your end panels are complete, you’ll want to stand them up. If you’re alone, you can lean one side up against the wall and clamp the two ends & the bottom pieces together. But I was helping Glen, so we didn’t need clamps for this stage.
We just screwed straight from the outside Panel into the 2×4 side rail. We drove 2 2″ screws into each side. You want to make sure you drive them deep. The top of the screw should be 1/4″ deep.
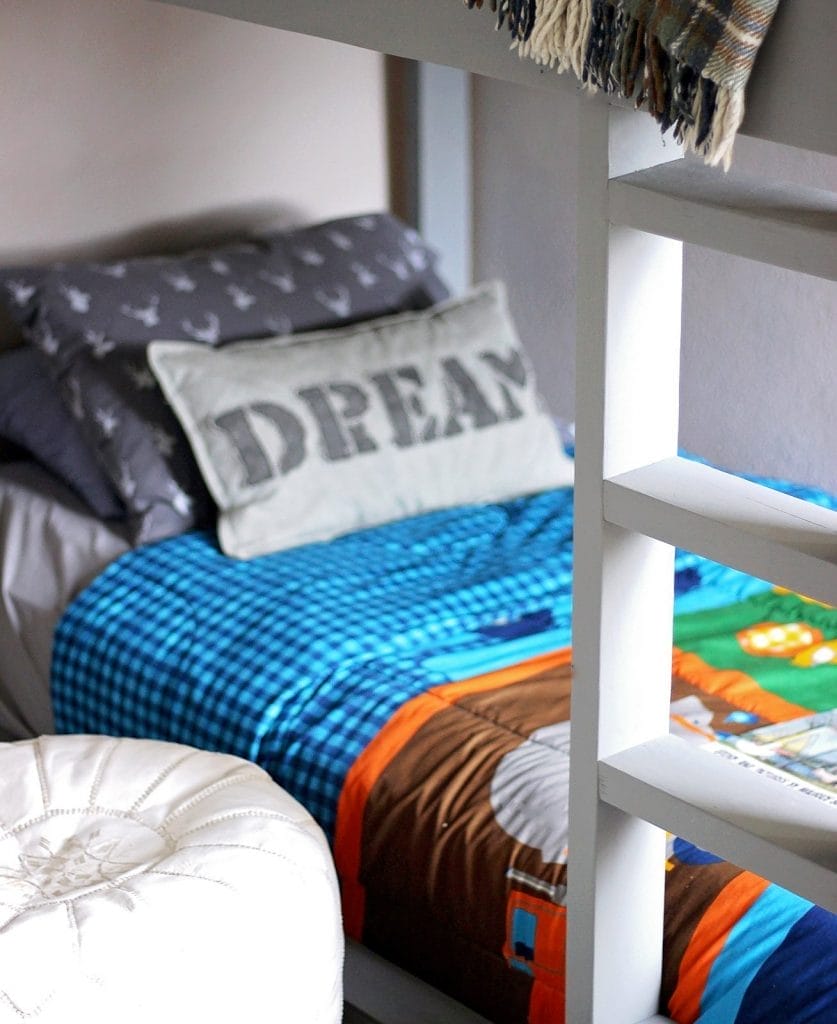
Next step – do the exact same thing to the top side rails, except turn the 2×6’s on their sides. Drill your 3 pocket holes. We put 3 2″ screws on each side for added support. what we did was screw 2×2’s into the top 2×6’s. Basically it creates a ledge on both sides. You’ll want to put a handful of screws in. I believe we put 12 2″ screws on each side. Then once the side rails are screwed onto the 2×6’s, you’ll want to screw your slats down. This isn’t necessary, but our kids play on their beds a lot, and we find that if we don’t, the slats shift a lot! For slats, we used 8 1×4. So we also screwed those down and done! Also, for smaller kids, I suggest a side rail too. I’m not a fan of them at all – but you can make one super easy!
Once both sets of side rails are screwed on, it’s time to put on the bottom of the triangle on the ends. Start making your pocket holes on each side, we only used two on each end
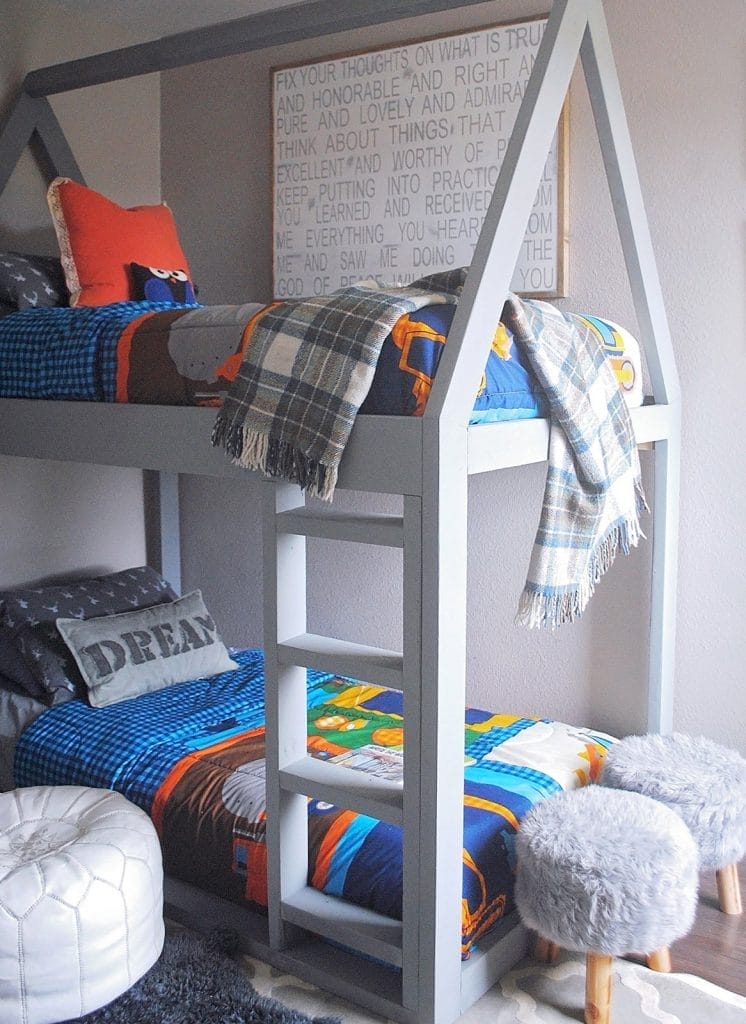
Now Attach the top stringer, fill holes & choose a paint or stain! We went out that night and bought a bed rail to attach to the top bunk, but you could add your own with another piece of wood when putting the bed together.
Jessica-Sara Morris and her husband run a home-based business building rustic furniture on a dreamy Vancouver Island in British She publishes White Picket Farmhouse, a Home & DIY Blog, where she enjoys writing about new builds, home decor and being a mom to three littles.
Hi! I love this!! Could you share how you added a bed rail please? Thank you!
Hi, Holly! This was a fabulous guest post. You can reach the author via the link in her bio at the bottom of the post if you have a question about something not explained in the post. Hope this helps!
Meant size of board. 2×4 obviously.
I just emailed Jessica (the guest contributor) to aks — great question! I’ll let you know what she says.
Just kidding…omg. Dummy.
Hey!! What are the lengths for the roof? I only see angles?